More and more people are preferring Google slides over MS PowerPoint because for using Google Sides they don’t have to pay anything nor download any software as it is an online application. On the other hand, for using PowerPoint users need to download MS Office separately, which can often be a tedious job. In this article, we will share an essential trick to all the Google Slide users by which they will be able to add a custom gradient to their presentation.
Make a custom Gradient Background in Google Slides
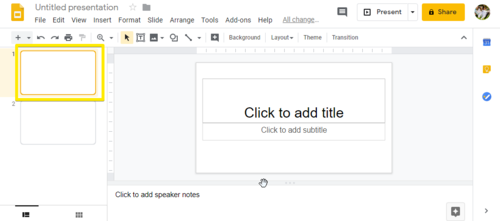
The following steps guide you to create and use custom gradients in Google Slides Open the Google Slide document. Once the document is open, you will be able to add a gradient by clicking on the thumbnail in your left preview window that you want to change.
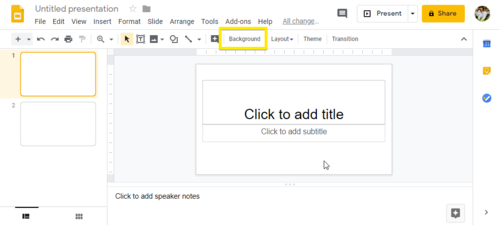
Go to the top of the workspace and eventually click on the “Background” option.
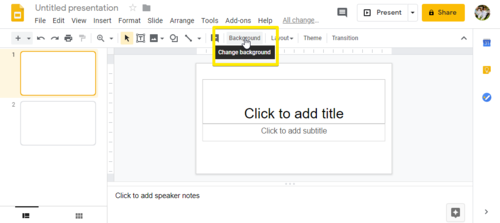
When you will hover the mouse pointer over the “Background” option, the content may display as “Change Background.”
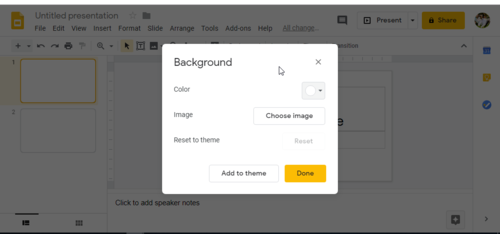
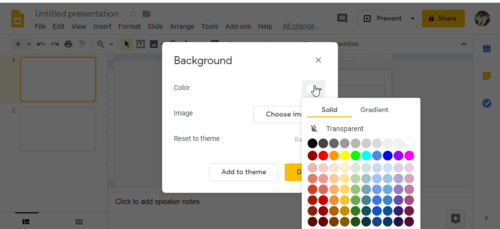
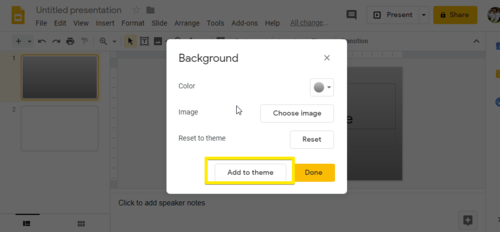
As you will execute the previous step successfully, you will be redirected to the “Background” window, where you will find the “Color” and “Image” option.
Next, to the “Image” option, you will see a button with the content “Choose Image.”
By clicking on the “Choose Image” button, you will be able to add an image to the slide background. Similarly, next to “Color” option, you will find two types of background colours, which are Solid and Gradient.
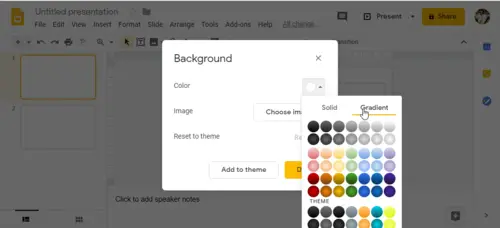
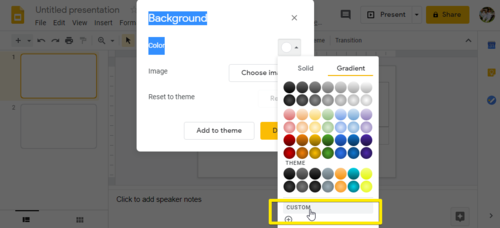
By selecting the “Solid” menu from the “Color” option, you will be able to add basic colors to your document. However, if you click on the “Gradient” menu, you will see a different color set. These color patterns have built-in options just like the “Solid” menu, but the difference is that they are gradients. Now to set up a custom gradient, click on the color swatch you want to include. After selecting your preferred color, you need to click on the “Custom” menu, which will take you to the “Custom Gradient” settings.
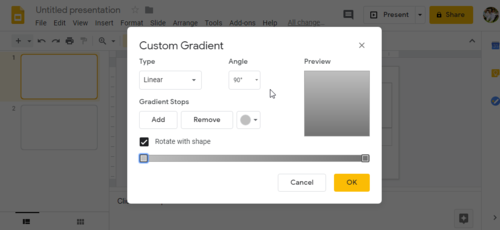
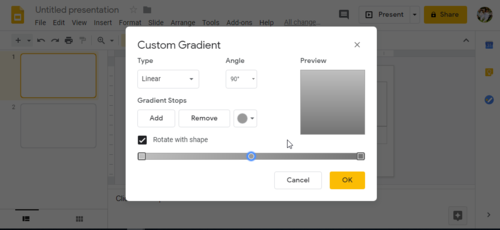
As you will enter the “Custom Gradient” settings, you will find several options. At the top of the window, you will find two drop-down menus, which are “Type” and “Angle.” You will also find a “Preview” option where you will be able to see how the gradient will look before applying it to the slide.
Just below the drop-down menus, you will find the “Gradient Stops” option, which will allow you to add, remove stops, and change their colors in gradients. Moreover, you will also find a stop slider, which will help you to adjust the balance of each color relative to each other.
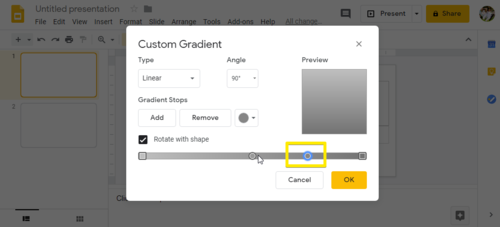
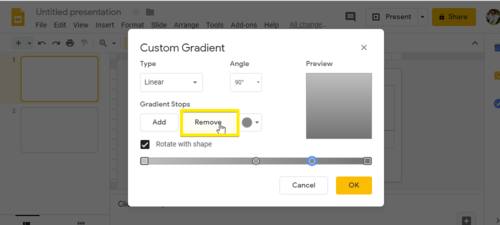
To change the previous Gradient stops, You will find that there will always be two different color stops in your gradient, which will be located along the right and left sides. You will not be able to get rid of these stops, but still, you can change their color. So, in order to change the color, you need to first go to the “Gradient Stops” color circle, and then click on it. Finally, select a color swatch of your choice. After selecting the appropriate color, click on the “OK” button to execute this step successfully. As mentioned earlier, you need at least two stops to create a Gradient, so in this step, you need to add the next stop. So in order to add a stop, you need to click on the “Add” button, which is present just under the “Gradient Stop” menu. As you will click on the “Add” button, Google Slides will automatically generate a new stop in the center of your gradient bar. However, if you don’t like the new stop, you can remove it by clicking on the “Remove” button.
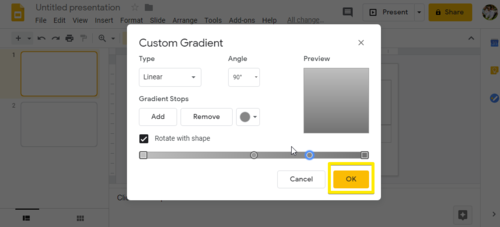
So after adding the new stop, you can go to the “Type” and “Angle” option to adjust your gradient’s direction. As soon as you finish adjusting the gradient, click on the “OK” button.
As you will click on the “OK” button, Google Slides will exit the Gradient Editor and take you back to the slideshow. With the execution of this step, the whole process will be completed.
However, if you want to apply the gradient to all the slides in your presentation, then you need to click on the “Background” option and finally select the “Add to theme” button.
As promised at the beginning of this article, we have mentioned the easiest way to create and use custom gradients in Google Slides. Finally, in the end, we can say that by executing the above-mentioned steps successfully, you will be able to make unique and attractive presentations. Now read: How to convert Google Slides to PowerPoint and vice-versa.