Change Ownership of a File or Folder in Windows 11/10
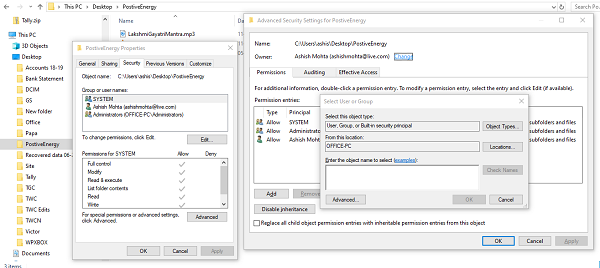
1] Open File Explorer, and navigate to the file or folder of which you want to change the ownership. Right-click on it, and then click properties. 2] Switch to Security Tab in the properties window, and click on the Advanced button at the bottom right. It will open the Advanced Security Settings of that file or folder.
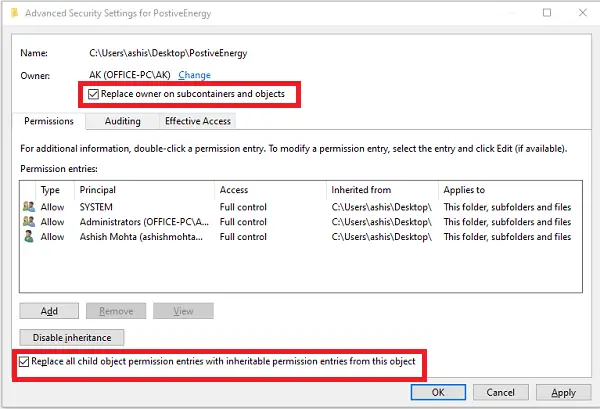
3] In this window, the current owner will be listed with the Change link available (next to the “Owner:” label) Click on it. It will open the Select User or Group window. Click on the available Advanced button again, and then click on the Find Now button. 4] It will list down all the users, and groups available on the computer. Select the user you want to give ownership to, and click ok, and Ok again. 5] You will be back to the Advanced Security Settings, but the owner will be changed to whoever you have selected. There are two additional options you need to check. They will help you transfer the ownership of the sub-folders and files inside them.
Replace owner on subcontainers and objectsReplace all child permission entries with inheritable permission entries from the object.
Once you confirm the changes, it will completely transfer the ownership. However, there is one last thing you need to do. To remove access of any other user, go back to the Advanced Security Settings, and remove any existing user. It will make sure only the assigned user has access to the file or folder. Do remember to create a system restore point first.